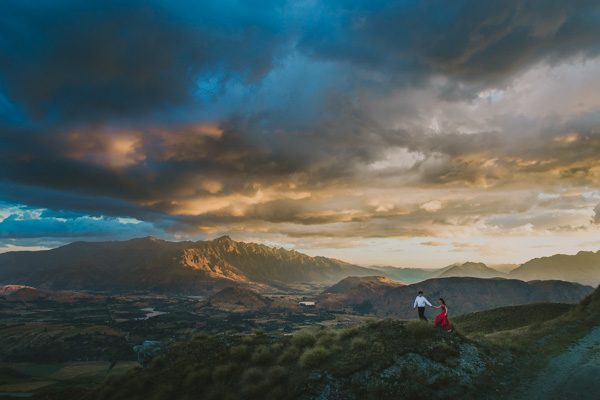
Location:
Queenstown, New Zealand
Time:
Dusk
Equipment:
Canon Mark 3, EF24mm f/1.4 L II USM
Camera Settings:
1/200 ISO 1000 F 5
The Inspiration
This particular photo took a lot of planning and luck and forethought, so it would be remiss of me to describe how I took it without at least covering some of the background. I didn’t just end up on a mountain in New Zealand without a beautiful couple at sunset by chance, and so if I want to be instructive I need to explain the process from the very beginning.
Basically, I was contacted by a very adventurous couple who wanted me to take photos of them pretty much anywhere I chose. I did some research and suggested New Zealand. The couple agreed, and for the next few weeks, we planned a 2-day photo jaunt on the South Island, which would take us to a number of memorable locations. My style is very much influenced by landscapes, so for me, it was a perfect arrangement.
I landed in Queenstown a few days early, and with some basic ideas and locations already jotted down from my internet research, I drove around to a number of sites, taking care to scout the most promising places at dusk, when I knew the light would be most ideal.
This location pretty much had it all – other spots nearby for a variety of images, and a view that gave out to the Remarkables. I knew it would work out well.
Next, the logistics of getting the couple to the location with makeup artist in tow, and then directing them for the image I pre-visualised in my mind. (I’d also suggested a red dress for GeGen, the girl, because I knew it would stand out against the generally pale green landscapes we were going to be shooting in).
Larger landscape photos, in which the couple are relatively small, require different sort of body positions than closer images. If you have the couple cuddling or kissing, you lose them both in the scale, and they become a blob. This is particularly true in the case of silhouette landscape shots. So it’s often a good idea to separate them. I did this by asking Fred to lead GeGen by the hand, along a short ridge of ground. It’s also important that the couple don’t obscure each other, and that they don’t walk on the near or far side of an incline, or else you lose their legs either behind the hillside, or against it. Other than that I don’t give them too many specific instructions. I encourage them to be natural and to enjoy themselves, and this way I often get images that look less staged, and that are a bit more surprising. (this is particularly important for closer images, but still holds true for shots like this one). Then I take a lot of photos, (I think around 50 for this particular scene), and choose the best one.
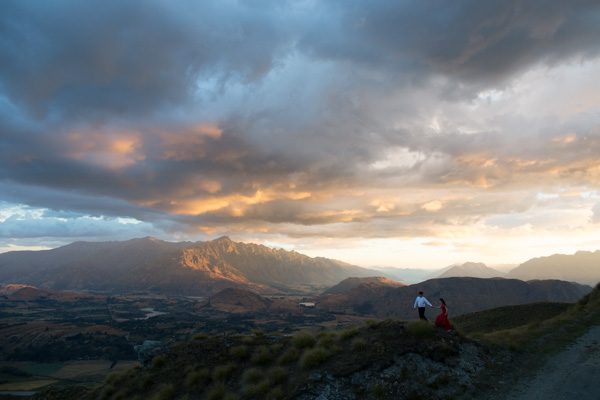
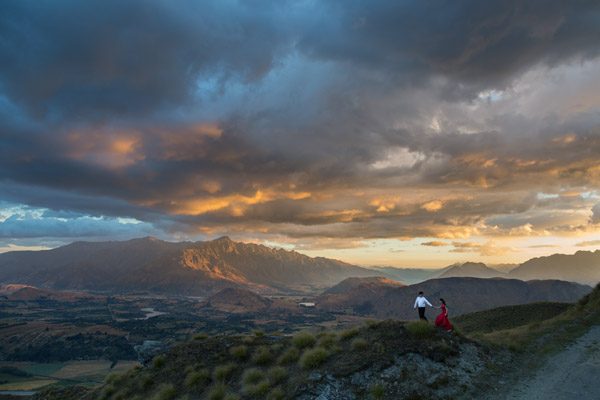
Here is the SOOC: (1)
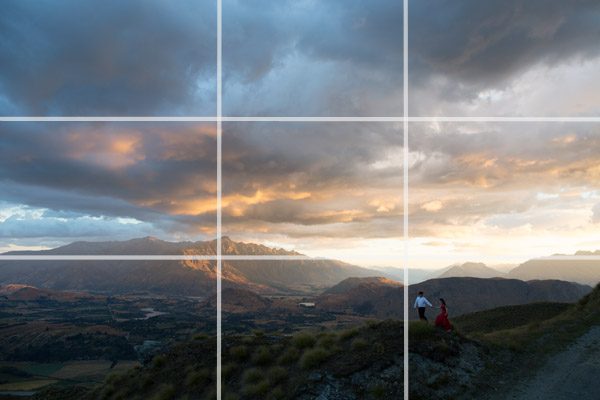
I’m not one for following composition rules strictly, but I find I end up often adhering to the rule of thirds by way of a subconscious aesthetic. Note the position of the couple at the intersection, and the line of the horizon.
Regarding my settings: for these sort of landscape shots I shoot manual, slightly underexposed. I knew the lower half of the shot was going to be murky SOOC (Straight Out Of Camera), but I wanted to ensure that I didn’t lose data in the highlights. I blew out a small section of the sky, but not too much – Canon’s DR doesn’t allow me to underexpose too much, without compromising the quality of the shadows when I raise them in post, so there often has to be some compromise.
Post Production
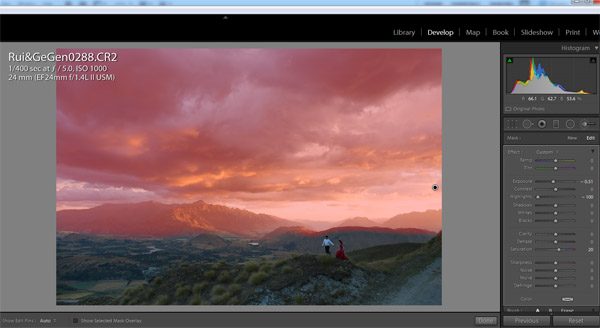
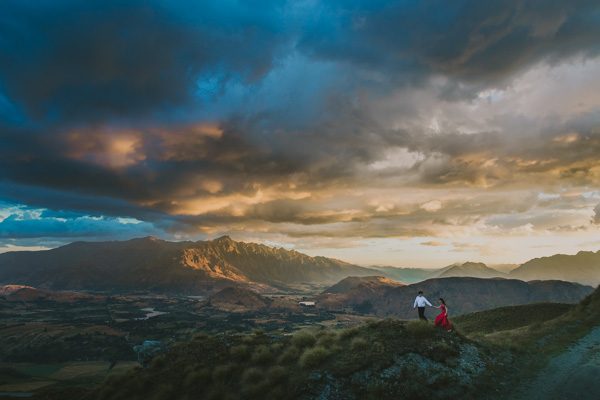
For post production, I work almost exclusively in Lightroom. First I darken the sky a bit, add some saturation, and raise the highlights. This brings out the drama of the sunset. I don’t use the graduated filter for this, because I want the entire sky to be altered evenly, and I need to trace the contour of the mountains, so I paint it on with the adjustment brush.
Next I raise the shadows in the lower part of the image, not a great deal, but subtly. I also specifically raise the clarity and brightness of the couple themselves, to make them pop against the landscape. Our eyes must be drawn to them, and not lost in the rest of the scene.
Finally I add a graduated filter to darken the left, bottom and right of the image to draw the eye to the couple, and then I apply a custom filter to add my own special filmy sauce to the photo, and keep it in character with the rest of the photo shoot series (and the rest of my photos in general). I adjust this preset to suit the New Zealand images. Pretty much every wedding I shoot I create a custom preset using a consistent base across all my work.
Huge thanks to Van for sharing his creative and technical approach with us today! Love Van’s work? Well, you can see more of it in his Junebug member portfolio.
Great pictures. Nice post. Loved it.
This is so epic! Thanks for the editing insights! Very useful.
Thanks for the tips Van, nice of you to go into such detail.