photo by Adventure and Vow
One of the most common places small businesses advertise is Facebook and Instagram–and it’s easy to see why. They’re two social media platforms with billions of users you can target by interests, location, income, relationship status, and more to get your brand in front of those it will truly resonate with. And, since they’re both operated by Meta, they have a shared ad management system that is advanced, customizable, and fairly straightforward.
But building an ad from scratch can be tricky for someone who has never done it before. There are lots of decisions to be made that can affect the performance of your ad, including the holy grail of metrics–your ROI. We’re here to walk you through how to build a successful ad campaign for your wedding photography business on Facebook and Instagram one step at a time.
Understanding Facebook and Instagram as Ad Platforms
Facebook and Instagram are leaders in advertising due to their advanced targeting features and vast amounts of user data points. What this means for you is effective, specialized advertising that can help you zero in on your ideal customer. They also have incredibly versatile ad options so you can build a campaign tailored to your vision. Their ads are great at being natural to the user’s experience, feeling more like native content instead of intrusive. And since both platforms are owned by Meta, the company makes it easy to run your ads on both platforms at the same time.
Audience Basics
With nearly three billion monthly users on Facebook compared to Instagram’s one billion, there is an increased possibility of impressions when advertising on Facebook. But beyond just total reach, some factors make each platform’s user base slightly different.
One major differentiator is age. It may come as no surprise that the age demographic on Instagram skews slightly younger than on Facebook. Almost one-third of all Instagram users are between the ages of 18-24. So if you offer family and maternity photography in addition to wedding photography, Facebook might be the better option for your ads. Another thing to consider with age is income–the older the user, the more likely they are to have a higher income.
But the great thing is that both platforms have detailed targeting abilities. You can choose to promote your ad to incredibly specific audiences based on their interests, behavior, and even major life events (yes, you can target recently engaged couples!)

photo by Emily Barbarita Photography
Cost
The cost of advertising on Facebook and Instagram varies greatly from business to business and mainly depends on your budget. You will see advice time and again online that the more you invest in ads, the better the results will be. But Facebook and Instagram are known to be relatively inexpensive–so for someone new to advertising, they are great places to start. We’ll talk more about this later in the post, but just know that the minimum spend required for Facebook ads is $1 a day.
If you’re still wanting more information about what to expect from ads before jumping in, take a look at these case studies from real-life Facebook and Instagram ads.
Building Your Facebook and Instagram Ad
Now that you know the basics of advertising on Facebook and Instagram, it’s time to get your ad campaign up and running.
1. Create your Ad Account
Start on Meta Ads Manager. This is the all-in-one tool where you will control the operations for your Facebook and Instagram ads. Your brand’s Facebook ‘Page’ is required to host Facebook ads. Clients will be able to navigate to the Facebook page your ads are linked to, so you’ll want this to be your business page vs. a personal Facebook account. Simply visit this Account Overview page, and Meta will walk you through the steps to create your ad account.
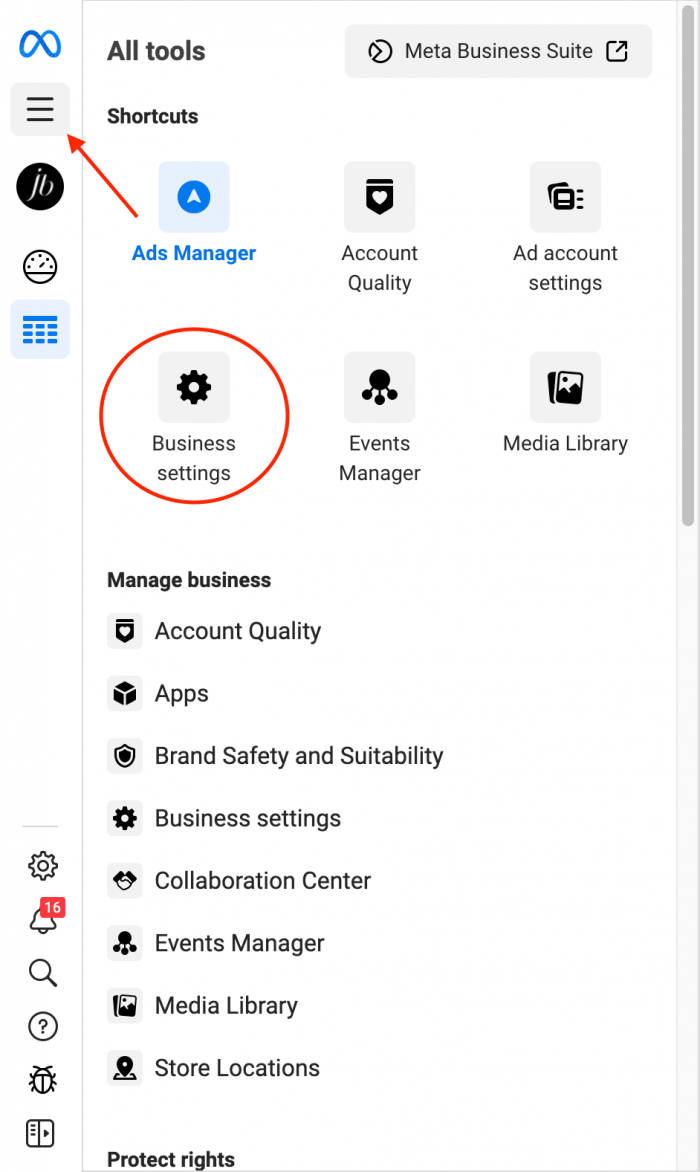
For Instagram, you’ll just need to link your Instagram Business account to your Ads Manager account. Go to the Business Settings, click “Accounts,” then “Instagram Accounts,” and lastly, click “Add.” Log in, and you’ll be all set.

2. Set up your Meta Pixel
The Meta Pixel allows you to track the actions taken by people who visit your website from an ad. It’s a small piece of code that, once implemented, will help you determine the effectiveness of your ads. Skipping this step will be tempting, but trust us, you’ll need the Meta Pixel to be able to measure the success of your ads. Here are instructions for setting up and installing your Meta Pixel. Good news: it sounds more complicated than it actually is—the whole process should take about ten minutes.
3. Set an objective
Once your account and pixel are ready, navigate to Ads Manager. When you finally hit “Create,” the first step will be to choose an objective. Don’t let all the marketing jargon ahead fluster you. Fundamentally, Meta wants to know what you’re hoping to accomplish with your Facebook and Instagram ads. This way, the ad campaign can be built to better suit that goal.
There are several options to choose from, all of which are broken down by Meta here. If you’re having trouble identifying what you want to do with your ad, this article will be a huge help.
Photobug’s TL;DR Meta Ad Objectives breakdown:
- Awareness ads extend your reach to get you in front of new customers but aren’t recommended if you’d like users to take action (like going to your website or subscribing to your mailing list).
- Traffic ads send potential clients to your website or another destination outside of Facebook or Instagram.
- Engagement ads encourage users to take action on your ad or page, like sending you a message, viewing a video, or interacting with a post.
- Leads ads use messages, phone calls, or signups (to your email newsletter, for example) to collect leads for your business.
- Sales ads are most helpful for e-commerce stores that want to reach people most likely to make a purchase. You’ll need to have pixel data before you can create a sales campaign.
- App promotion ads take users to the mobile app store to encourage users to install an app or make a purchase.
For wedding photographers, we recommend a funnel approach to Facebook and Instagram ads. This works by starting with awareness campaigns to target a new audience, then creating traffic or engagement ads to retarget the audience from your awareness campaign.
4. Define Your Target Audience
First, know that “ad sets” are targeting groups. There is a lot of content in this section and (sigh) even more jargon. Just know this is where you’ll define who will see your ad. You can target Facebook and Instagram users based on just about anything, including location, age, and gender. This is when the platforms’ enormous amounts of user data comes in handy for advertisers.
In the “Detailed Targeting” section, you can get even more specific by targeting interests, behaviors, and more. One that we highly recommend is “engaged in the last three months.” Maybe you want to refine your audience even further and add “adventure travel” or “luxury goods” as interests. The choices are plentiful to help you can find and advertise to your ideal client.
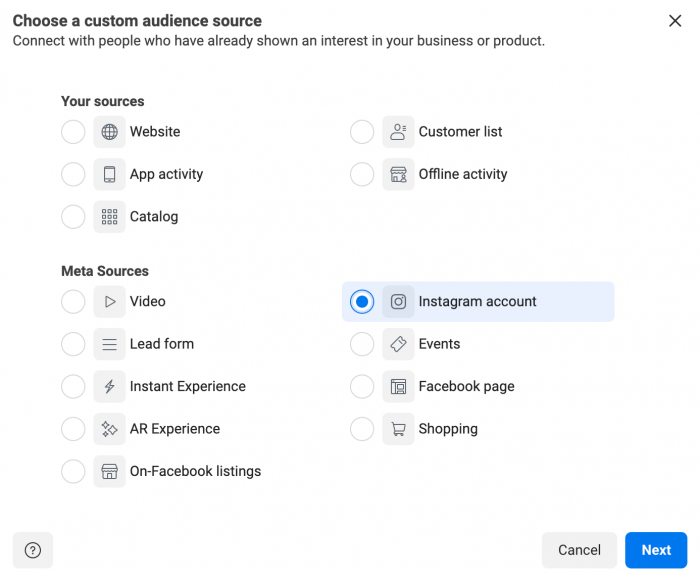
You can also create custom audiences of users who have already interacted with your business. For example, your Facebook pixel will allow you to create a custom audience of users who have been to your website before, users who follow you on Instagram, or users pulled from your email list. Here’s where things get interesting: you can then create a lookalike audience to target people similar to your best customers. This Meta article will tell you more about lookalike audiences and how to create your own.

5. Choose the Ad Type
Next, choose what ad type to use. There are several formats–or types–for Facebook and Instagram ads. Seer Interactive does a great job of outlining what’s available and what they’re good for.
Most small businesses have to invest in photography or a creative to help them make eye-catching ads. But lucky for you, chances are you already have great options for ads sitting on your computer. Videos are especially great for ads, so consider making a slideshow, a montage, or a behind-the-scenes video mixed with final shots.
And when writing the text, just make sure your call-to-action is clear. The human attention span while scrolling is short–so be concise and to the point, but avoid generic copy. Unique and personalized copy will be more attention-grabbing.
6. Set Your Budget
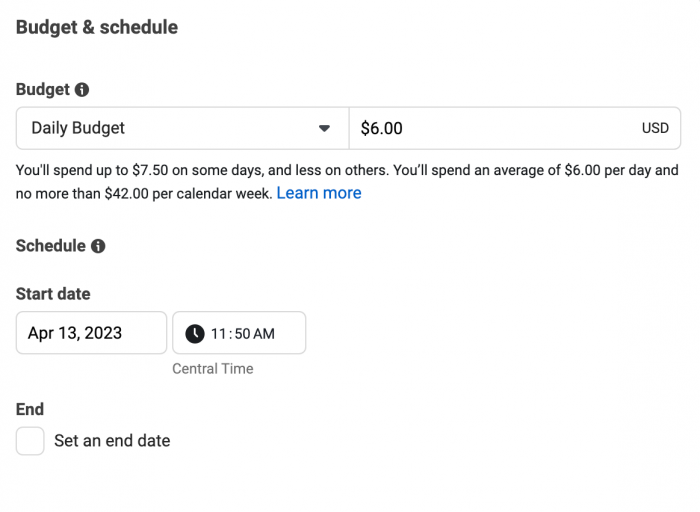
How much money can you allocate to your advertising campaign? It’ll be up to you to check your budget and decide what amount is right for you. One rule of thumb from Keap is to spend $1 for every 100 website visitors you get each month. So if your site receives 600 visits per month, then the suggested amount to start is $6 per day.
It may be obvious, but the more money you invest in your ads, the more ROI you’ll see. But that doesn’t mean you have to start with huge numbers. The minimum spend required for Facebook Ads is just a dollar per day. So you can start low and monitor.

7. Review your Personal Pages and Website
This is an important step before you hit publish on those ads. It’s crucial before you start sending potential customers to your pages that you make sure they are optimized and updated. Here are some tips:
- Post your latest and greatest wedding galleries
- Update your cover and profile photos
- Check that your contact info and outbound links are all correct
- Delete any unprofessional or outdated content
Now you’re all set to publish!
Measuring Your Ad’s Performance
After your ad is live, it’s time to watch the results. You can track your campaign performance within Ads Manager–though it’s not exactly the easiest to navigate for non-marketing experts. A key to utilizing these metrics is remembering what your objective was in the first place.
Metrics to Watch
There are dozens of metrics, but some of the more important ones for evaluating your ROI are CPC (cost per click), CTR (click-through rate), and conversion rate. If your ad objective was outbound clicks, the CTR and CPC would be two important metrics to watch. If awareness was your objective, then impressions and engagement will be crucial to analyze your ad’s performance.
Performance results will be displayed almost immediately, but we suggest waiting at least seven days, or enough time for your campaign to complete its learning phase, before adjusting your ad according to the data. Once a little time has passed, you can begin filtering your campaign(s) by ad type, date range, and more. Comparative views of your results will allow you to fine-tune your ad approach for even better results in the future.

photo by Kikitography
Optimize Your Campaign
Creating a successful ads campaign takes trial and error. Once you have analyzed your metrics, it’s time to experiment with ad variations to optimize your campaign. You can test different versions of headlines, primary text, imagery, and targeting. It’s important that you only change one variable at a time so you know which variables to attribute positive and negative results. From our experience, changing the imagery and the targeting has given us the most dramatic results.
Final Tips for Facebook and Instagram Ad Success
- Google Analytics is another platform that will give you additional metrics on your ad performance
- From marketing agencies to freelancers, there are tons of options available for outsourcing your ads at varied prices.
- Lastly, don’t forget to interact with the people who engage with your ad through likes and comments.
That was a lot to take in. Take a deep breath and know that several photographers have run successful ad campaigns on their own–and you can too. If you have questions, feel free to share them in the comments below or in Photobug’s Facebook group. Make sure to check out our 15 tips for getting published, which is another great way to boost your bookings.

photo by Carey Nash